
Home › All guides › Bicep Heart pose
Bicep Heart pose
The Bicep Heart pose takes four beats: smile at the camera, grip the opposite upper arm, flex that bicep toward the lens, then curl the free hand onto the muscle so the hand and arm make a heart. The steps come first on this page; the generator route is below them, followed by the fixes for a heart that does not read.
How to do the Bicep Heart pose in four steps
The heart is mostly the hand. The muscle is the backdrop. That is why the pose works on more body types than a strict “make a heart with two biceps” hold.
- Face the camera and smileStand or sit with both arms in frame. A relaxed, front-facing start gives the camera a clean base. Smile — the clip is a joke, not a flex competition.
- Grip the opposite upper armReach across with one hand and grip the opposite upper arm just above the elbow. This anchors the pose and brings the flexed arm across the body.
- Flex the bicep toward the lensTurn the flexed bicep toward the camera and bring the fist near your ear. The muscle is the curve behind the heart, not the heart itself.
- Close the heart with the free handCurl the free hand onto the muscle so the thumb and fingers finish a small heart against the arm. Hold it for the last beat, then let the clip end.
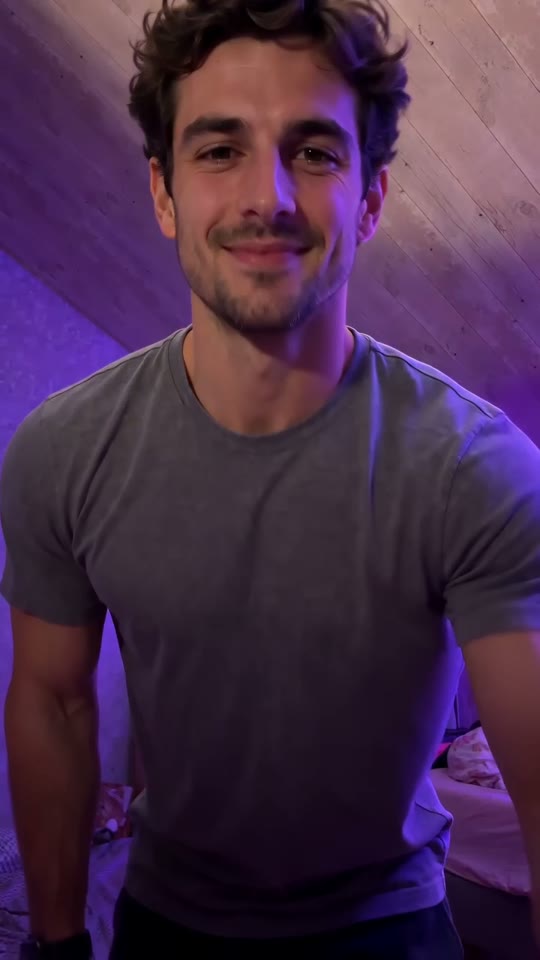
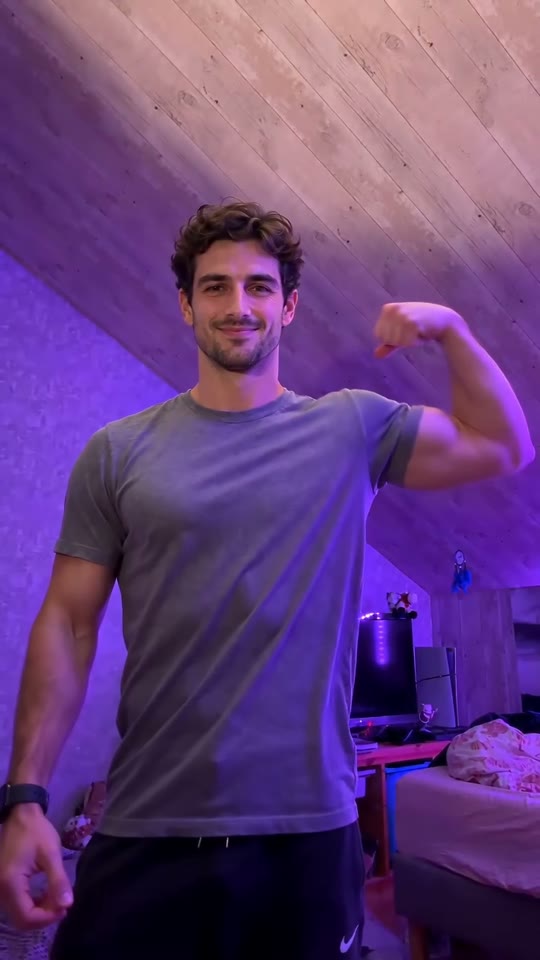
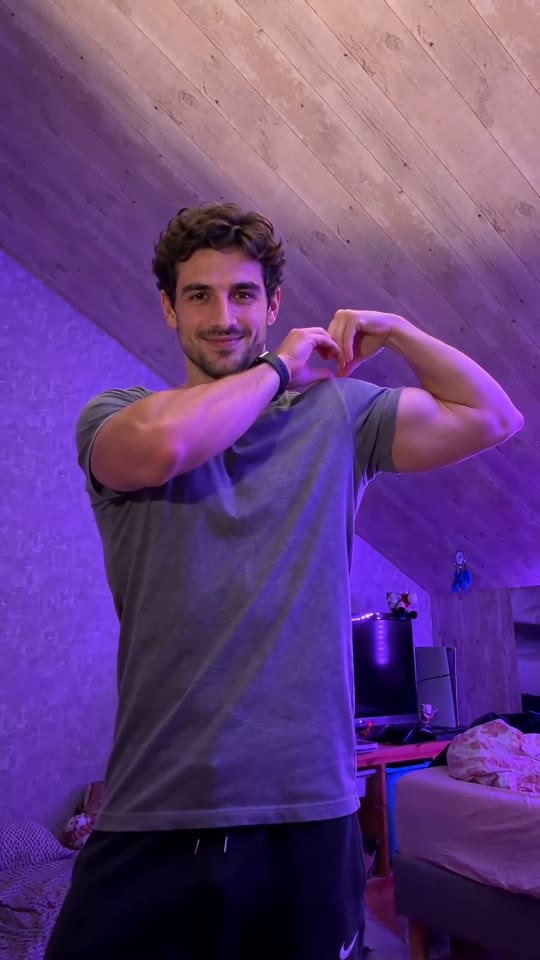
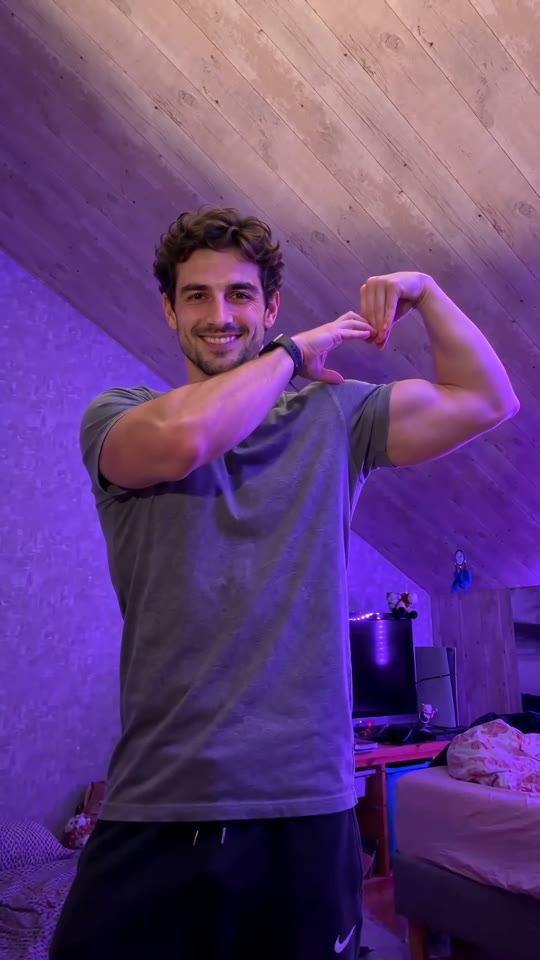
How to generate the Bicep Heart pose from a photo
Upload one waist-up portrait to the Classic Pose template. The reference clip performs the four beats; your photo supplies the face, hair and outfit. You do not need to film a take, write a prompt or download an app.
A seven-second 768P render is 5 credits; 2K is 8. The workspace shows the exact total before you submit, and a failed render returns its credits. The clip comes back silent — add the sound when you post.
Bicep Heart pose camera and photo requirements
Waist-up is enough. Both arms should be in frame. If the camera is too tight on the face, the heart disappears. If it is too wide, the flex reads as a shrug.
Even light from the front beats a window behind you. A side light can split the heart in half. Short sleeves give the hand and the bicep a clear edge; long sleeves blur the line the heart depends on.
Film the Bicep Heart pose or generate it?
If you film the pose, you control the timing and the sound on the take. If you generate it, the reference clip owns the timing and you add sound later. Generate when you want your face on the pose without performing it. Film it when you want the real motion of your own arm.
Do not upload a photo that already shows the finished heart and expect the generator to “hold it.” The model is following a sequence that starts from a standing portrait.
Bicep Heart pose problems and fixes
The heart is made by the gap between a curled hand and the curve of a bicep. That gap is where the model fails first: fingers soften, the palm merges into the arm, and what should be a shape turns into a blob. A clear, unobstructed starting photo helps; it does not guarantee a perfect heart on every run.
If the hand and the arm fuse together, the fix is distance, not a different prompt. A photo where the arm sits a little away from the body gives the model a visible gap to keep. Arms pressed flat against the chest leave nothing to separate.
If the heart does not form at all, the starting angle is usually too square to the lens. A slight three-quarter turn, with both elbows still in frame, gives the curl somewhere to land. A full profile is worse rather than better — the model then rebuilds the face instead of the arm.
If the face stops looking like the person, the source photo is the cause. A tight crop, a heavy beauty filter, or light from one side leaves too little texture to carry. Upload a straight-on photo in even light.
If the proportions stretch, the subject was too small in frame. A full-body shot of someone two metres away gives the model a handful of pixels for a face. Waist-up from about a metre is the range that survives the render.
These are all inputs you can change before spending a credit. Once a render completes it is billed; a job that fails returns its credits. So fix the photo first, then generate.
How do you do the Bicep Heart pose?
Four beats: face the camera and smile, grip the opposite upper arm just above the elbow, flex that bicep toward the lens with the fist near your ear, then curl the free hand onto the muscle so the hand and arm make a heart.
Which arm do you flex in the Bicep Heart pose?
Either. Pick the arm you want to show, then use the other hand to grip it and close the heart. The pose works on both sides; the reference clip uses one side consistently.
What if the Bicep Heart pose doesn’t look right?
Change the input photo, not the prompt. Give the arm space from the body so the gap survives, use a slight three-quarter angle instead of a square-on pose, and avoid tight crops or heavy filters. A failed render refunds its credits.
Can I do the Bicep Heart pose with one arm?
You need both: one arm flexes, the other hand closes the heart. A one-armed version can read as a flex but not as the Bicep Heart shape.
Why do my fingers merge into my arm in a Bicep Heart video?
The model needs a visible gap to separate the hand from the arm. If the arm is pressed against the body or the photo is soft, the fingers blur. Use a photo where the arm sits slightly away and the hand is the sharpest part of the frame.
Can I generate the Bicep Heart pose from a photo instead?
Yes. Upload one waist-up portrait to Classic Pose; the template performs the four beats. A seven-second 768P render is 5 credits, and the clip comes back silent.